Sunday, 8 November 2009

BLUE CHRISTMAS WITHOUT YOU


Supplies Needed:
psp
font of choice
animation shop
scrapkit Winter Magic by Monica OF Tantrum SCRAPS
tube of choice I used BARABRA JENSON here
wsl_mask314 by weescotslass here

NEW IMAGE 600 X 600
FLOOD FILL WHITE
NEW LAYER SELECTIONS SELECT ALL
COPY AND PASTE INTO SELETIONS ON NEW LAYER
PAPER 6 DESELECT
LAYERS LOAD MASK FROM DISC FIND WSL MASK 314
DELETE MASK LAYER AND MERGE GROUP
COPY AND PASTE ROSE 2 AND POSTION IN MIDDLE
COPY AND PASTE RAIN DROPS 1 AND PLACE BEHIND ROSE
COPY AND PASTE BOW 9 AND PLACE OM THE LEFT ON THE RAIN DROPS
RESIZE 80% DUPLICATE AND IMAGE MIRROR
COPY AND PASTE DOODLE OF CHOICE AND PLACE BEHIND ROSE
COPY AND PASTE FRAME 4 AND PLACE BEHIND BOW LAYERS
COPY AND PLACE TUBE IN MIDDLE OF FRAME LAYER
AND NAME IT TUBE 1
DUPLICATE IT RENAME IT TUBE 2
HIGHLIGHT TUBE 2
AND USING YOUR PUSH BRUSH SIZE 3
PUSH THE EYE CLOSED WITH YOUR BRUSH
ADD YOUR NAME AND ALL COPYRITE,S AND URL,S
MAKE SURE TUBE 2 IS CLOSED OF AND COPY AND PASTE
IN ANNIMATION SHOP
BACK IN PSP HIDE TUBE 1 AND UNHIDE TUBE 2 COPY MERGED
AND PASTE INTO ANNIMATION SHOP AFTER CURRANT FRAME
IN ANNIMATION SHOP EDIT SELECT ALL
ANNIMATION FRAME PROPERTIES 75 OK AND SAVE AS
TUTORIAL WRITTEN 8TH NOVEMEBER 2009 BY CHEEKY. DO NOT COPY OR ALTER IN ANY WAY OR CLAIM AS YOUR OWN.

Sunday, 13 September 2009

Forever Feathered Friends

Photobucket

supplies needed


Im using the art of ISMAEL RAC . HERE

You will need the proper licence to use his work.

The scrapkit i am using is PTU called Potpourri,and it is By Seachell. HERE

I am also using Mask Sg_Stencil-Flowered-Circle By Essex Girl. HERE

Lets Begin:

Open 700 x 700 white canvas.

Paste Frame 4 on your canvas,resize by 70%.

COLOURISE to the colour of your tube

Using your magic wand,click in the center of your frame,

Selections,modify,expand by 5 pixels,Invert.

Copy and Paste Paper 2 as a new layer,hit delete,and drag paper below the frame.

Keeping your frame layer active,Add a close up tube,lower opacity to 86,

Hit delete,select none,drag below frame layer.

Add your other tube,place it where you desire,add a drop shadow of your choice.

Now make the tag your own,Place elements of your choice,resizing and adding drop shadows .

X out your background layer,Layers,merge,merge visible,

Image resize,i resized mine at 80%.

Un X your background layer,keep it activated,

Copy and Paste a paper of your choice as a new layer,

Add the mask,layers merge,merge group,Image,resize by 90%,

Layers,merge,mergeall flatten.

Add all copyrights,Add name of choice.

Save as a J-peg.

Tag finished.

Friday, 28 August 2009

FREEBIE FRIENDS ANGEL

Photobucket


SUPPLIES NEEDED PSP
TUBE OF CHOICE I USED JENNIFER JENSKO FROM CILM HERE
SCRAP KIT Angelic FROM STEF HERE
THANK YOU HUN FOR ALLOWING ME TO USE YOUR LOVELY KIT
MASK


Open 700 x 700 white canvas.

Paste Frame 3 on your canvas,resize by 70%.

Using your magic wand,click in the center of your frame,

Selections,modify,expand by 5 pixels,Invert.

Copy and Paste Paper 4 as a new layer,hit delete,and drag paper below the frame.

Keeping your frame layer active,Add a close up tube,lower opacity to 80,

Hit delete,select none,drag below frame layer.

Add your other tube,place it where you desire,add a drop shadow of your choice.

Place elements of your choice,resizing and adding drop shadows .

place gates behind your tube layer like mine

X out your background layer,Layers,merge,merge visible,

Image resize,i resized mine at 80%.

i,ve added annimation but you dont have to make the tut a guide line
for your own creativerty

ADD ALL COPY RITE,S AND NAME
ALL DONE SAVE AS

This Tutorial is written by me and any resemblance to any other tutorial is purely coincidental.
TUTORIAL WRITTEN 28th OF August 2009 BY CHEEKY. DO NOT COPY OR ALTER IN ANY WAY OR CLAIM AS YOUR OWN.

Saturday, 22 August 2009

GRAVEYARD GOING ON,S

Photobucket


SUPPLIES NEEDED
PSP
ANNIMATION SHOP
SCRAP KIT TWILIGHT BY TAMIE HERE
MASK OF CHOICE
I,VE USED A HALLOWEEN I HAD SINCE LAST YEAR
AND I CAN,T REMEMBER WERE I GOT IT FROM
IF IT,S YOUR,S PLS LET ME KNOW AND I,LL
CREDIT IT WITH YOUR DETAIL,S
TUBE OF CHOICE I,VE USED JAMIE KIDDD,S FROM HERE
OPEN A PAPER OF CHOICE AND PASTE AS A NEW LAYER
GO TO LAYERS LOAD MASK FROM DISK AND CLICK OK
DELETE MASK LAYER AND MERGE GROUP
PLACE TUBE OF CHOICE AND POSTION WERE YOU LIKE
PLACE TULLNETTING AS A NEW LAYER AND STRECH IT OUT TO FIT
HALLOWEEN MASK LAYER
IMAGE ROTATE 90 RIGHT
DUPLICATE AND MIRROR OPP 50
PLACE ANY ELEMENTS OF CHOICE
NEW LAYER SPARKLES
DUPLIACTE AND PLACE EACH SIDE OF FRAME LAYER
MERGE DOWN
GO TO PLUGINS XENOFEX 2 CONSTALATION SETTINGS
1.98 50 50 25 50 75 KEEP ORIGINAL IMAGE
RANDOM SEED 7622
add all copy rite,s and url,s
save as png

Thursday, 20 August 2009

Sexy Dreams FTU

Photobucket


Supplies Needed:

Im using the art of Ismael Rac HERE

You will need the proper licence to use his work.

The scrapkit i am using is FTU called Dreams. by OUR LOVELY STEF
THANK YOU HUN FOR THIS AWESOME KIT HERE

I am also using template 5 by Missy. HERE

Mask i am using is WSL_MASK_259. HERE.


Open template in psp

Shift+D To duplicate.

Close the original.

Delete the credit layer.

Click on background layer

Image,canvas size,700 x700,fill with white.

Activate circle layer,selections,select all,float,defloat,invert.

Copy and Paste paper 4 as a new layer,hit delete,select none.

Delete original circle layer.


Activate Retangle 2 layer,layers,merge down,now both rectangle

layers will be together.Select all,float,defloat,invert.

Copy and Paste paper 8 as a new layer,hit delete,select none.

Delete original Rectangle Layer.

Activate Heart Layer,selet all,float,defloat,invert.

Copy and Paste paper5 as a new layer,hit delete,select none.

Delete original Heart Layer.

Add your tube,drop it below the Rectangle Layer..

Add elements of choice

X out your background layer,Layers,merge visible,

Un X your background layer,keep it activated,Layers,new raster layer,

Floodfill with colour from your tag,Add mask,layers merge group.

Layers,add new raster layer,floodfill with another colour from your tag.

Add the mask again,layers,merge group,

Image,Rotate,free rotate,90 right.

Layers,merge,merge all flatten.

Tuesday, 18 August 2009

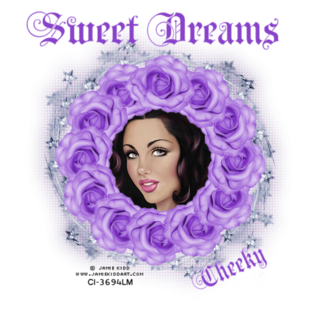
SWEET DREAM,S

SWEET DREAMS
Photobucket


SUPPLIES NEEDED
Tube of choice im using the work of JAMIE KIDD FROM CILM
FONT OF CHOICE I,M USING BLACK SWAN
SCRAP KIT DREAMS BY STEF AT FREEBIE FRIENDS HERE THANK YOU STEF FOR THIS WONDERFULL KIT SWEETIE
MURA MEISTER COPIES
OPEN NEW IMAGE 700X 700 FLOOD FILL WHITE
COPY AND PASTE SS DREAM ELEMENT 30 AS A NEW LAYER
COPY AND PASTE ELEMENT 9 AND RESIZE 30%
PASTE AS A NEW LAYER GO TO MURA MEISTERS COPIES
WITH THESE SETTINGS SHIFT MODE CIRCLE ---TILE MODE WRAP AROUND
BLEND MODE BEHIND COLOUR WHITE PRE-SET MENU ENCIRCLE CLICK OK
RESIZE AGAIN 95%
CLICK INSIDE WITH MAGIC WAND SELECTIONS MODIFY BY 3
PASTE PAPER ONE AND INVERT DELETE SECLETIONS NONE
MOVE BELOW
PASTE TUBE OF CHOICE AND PASTE IN MIDDLE OF THE FLOWER CIRCLE
ERASE ANY TUBE WHATS SHOWING
DUPLICATE ELEMENT 30 ADJUST BLUR-GLAUSSIAN 22
EFFECTS TEATURE WEAVE ON SETTINGS 3 3 2 FILL GAPS AND COLOUR PURPLE
ADD ANY MORE ELEMENTS OF CHOICE
ADD ALL COPY RITE,S AND NAME
ALL DONE SAVE AS
This Tutorial is written by me and any resemblance to any other tutorial is purely coincidental.
TUTORIAL WRITTEN 18th OF August 2009 BY CHEEKY. DO NOT COPY OR ALTER IN ANY WAY OR CLAIM AS YOUR OWN.

Monday, 17 August 2009

Stef,s a Babe

Photobucket


SUPPLIES NEEDED
Tube of choice i,m using ISMAEL Rac,s
Font of choice
MASK 191 BY WEESCOTS LASS
scrap kit here
I,VE GOT PERMISSION FROM FARRAH TO SHARE THIS KIT
OPEN A NEW IMAGE 700X700 FLOOD FILL WHITE
OPEN A PAPER OF CHOICE COPY AND PASTE AS A NEW LAYER
GO TO LAYERS AND LOAD MASK 191 FROM WSL
DELETE MASK LAYER AND MERGE GROUP
OPEN FRAME 3 AND PASTE AS A NEW LAYER
PLACE IN MIDDLE OF YOUR HEART
CLICK ON YOUR MAGIC WAND AND INSIDE SELCTIONS MODIFY AND EXPAND BY 4
COPY AND PASTE A PAPER OF CHOICE
SELECTIONS INVERT AND DELETE SELECTIONS NONE
MOVE BELOW FRAME LAYER
COPY AND PASTE THE LACE BACK AND PASTE BEHIND FRAME LAYER
RESIZE TO JUST OVER THE FRAME I NRESIZED IT 135
PASTE YOUR TUBE AS A NEW LAYER
AND POSTION INSIDE FRAME
ADD YOUR NAME
ADD ALL COPYRITE,S AND URL,S
DUPLICATE YOUR HEART LAYER ON THE ORGINAL LAYER GO TO ADJUST GLAUSION BLUR 22
THEN GO TO EFFECTS DISTORTION WIND 50
ALL DONE SAVE AS
This Tutorial is written by me and any resemblance to any other tutorial is purely coincidental.
TUTORIAL WRITTEN 17th OF August 2009 BY CHEEKY. DO NOT COPY OR ALTER IN ANY WAY OR CLAIM AS YOUR OWN.